anyone can draw with a grid
a beginner-friendly technique for accuracy, speed, and fun.

In a world where .jpgs "magically*" appear by typing an idea into a text box, image-making has fundamentally shifted. For many, it's easy to ask "what's the point of drawing anymore? Sam Altman has democratized art!" to which I respond, "art is exclusively made by humans, you are a human so art belongs to you, and I refuse to let some corporate shill who 'couldn't imagine raising a newborn without chatgpt' define what does or does not contain creative legitimacy." Also, drawing is fun!
This is a topic for another day, but it could be argued that online tutorials and blogs and forums already "democratized art" (whatever that means) since the ye olde days of secretive craft guilds and masters. You can learn how to draw with printer paper and a pen that you "borrowed" after signing your take-out dinner receipt. I personally learned how to draw by doodling in lined notebooks with fine Sharpie markers. The "cost" of learning to draw is not truly money, but time and patience. Anyone trying to convince you otherwise is trying to sell you something.
Also worth noting: discussions about learning art are often dominated by the classist idea that art requires some sort of training. In similar fashion, representational and realistic art tend to be overrepresented. Cultural artists using techniques passed down by their communities and "untrained" folk artists have been creating for millennia outside of "formal" institutions, making works that are just as much "art" as anything from a painting academy. Most of my favorite art is folk art. Art takes no single form, but challenging our brain with observational drawing is rewarding in many ways.
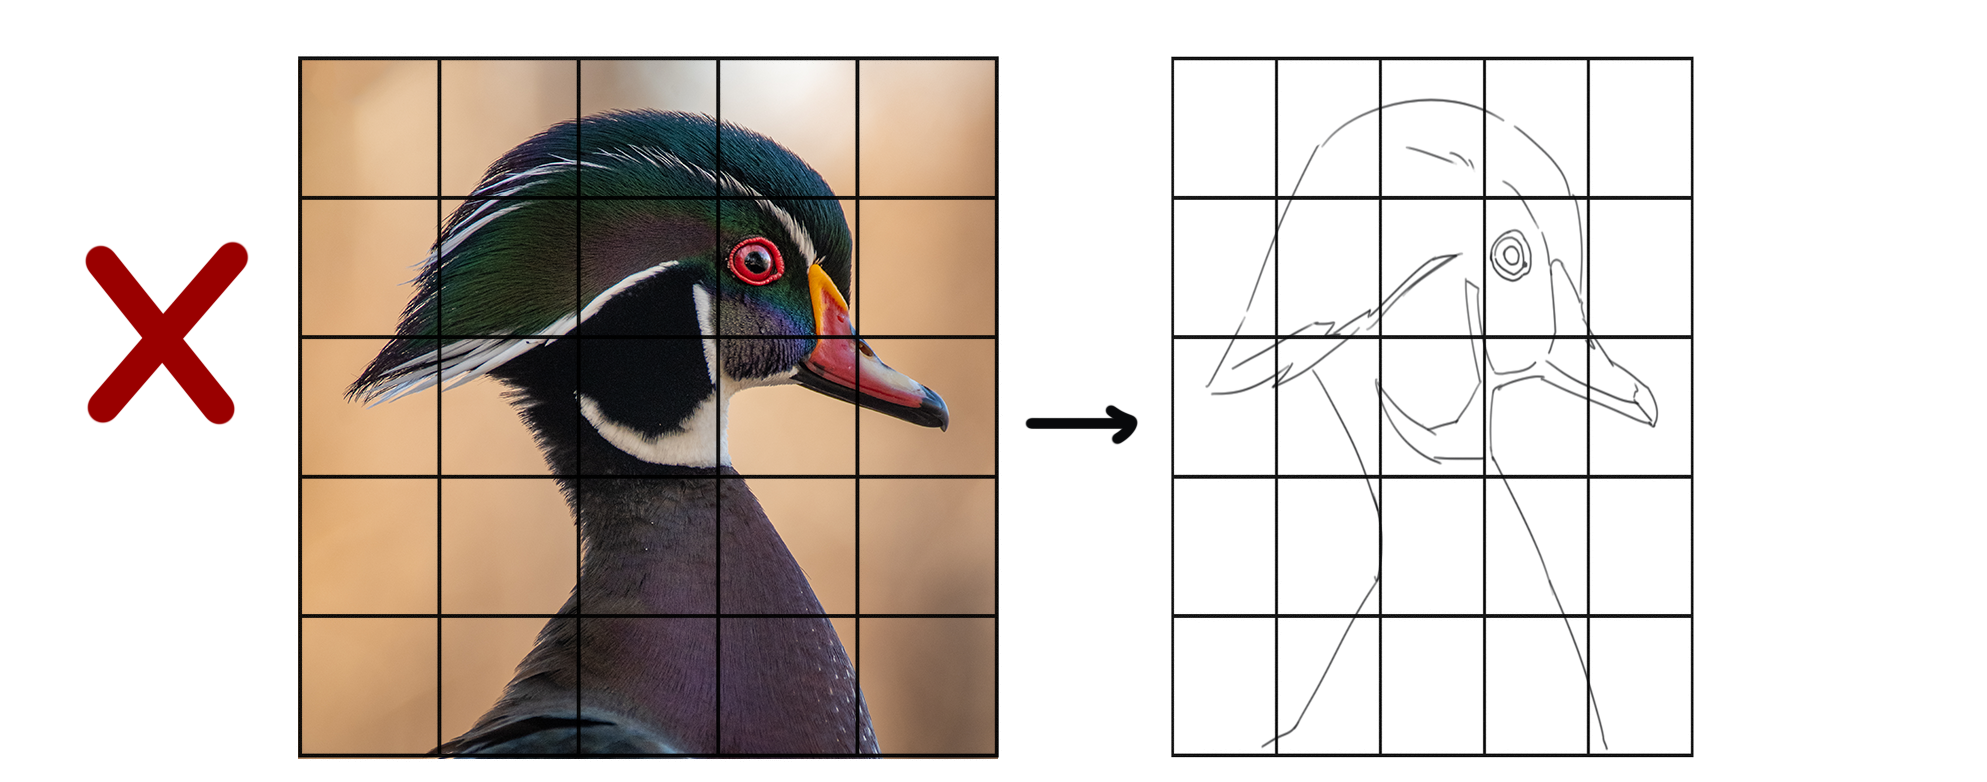
So let's draw! Drawing from reference is hard. It's a great exercise to draw upon a blank page, but there are age-old techniques to draw more quickly and more accurately to your reference. Drawing with a grid is very beginner-friendly, but it's a great tool at all skill levels!
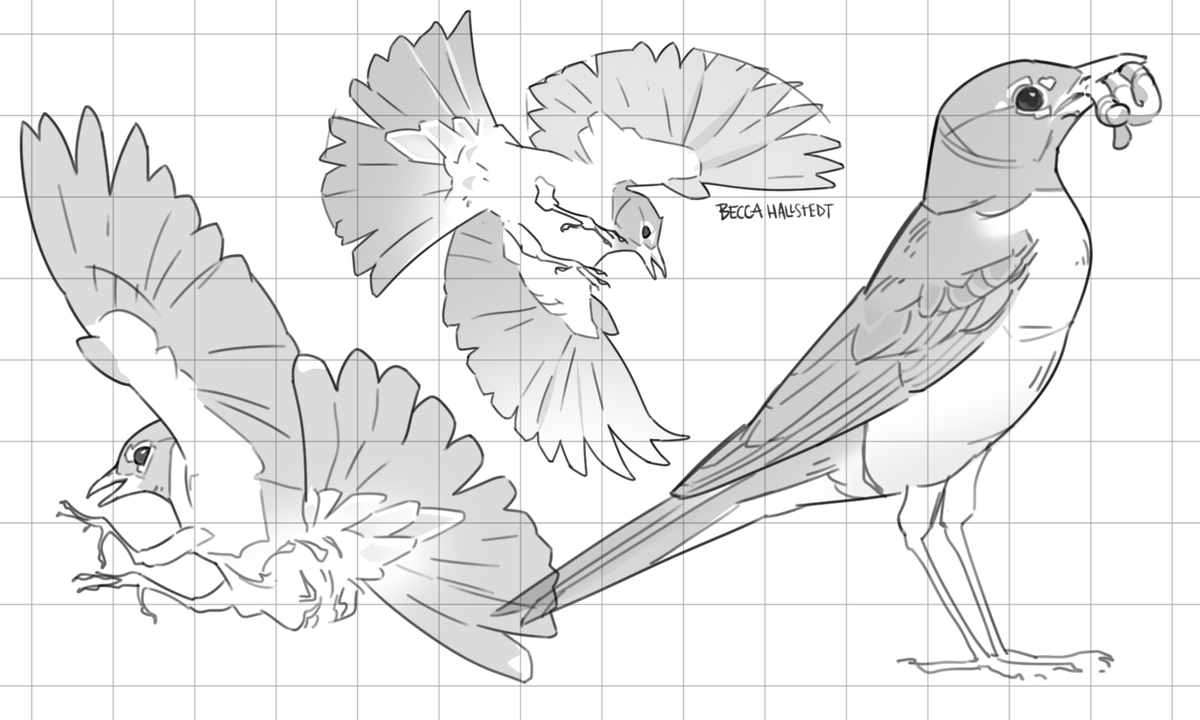
The grid method has been widely used by painters, muralists, and others across the creative spectrum for hundreds of years. When working in physical mediums, it can be used to scale the drawing up or down in size, like scaling up a mural design for a wall. When I took painting classes in grade school, we were often taught to set up our underdrawing with a grid, and it is a tool that I continue to use when working directly from a reference. It's extra fun when I took the original photo myself!
how to eat an elephant
One bite at a time. The grid method breaks a complex image down into smaller, simpler references. Don't overthink this question: which of these two options is easier to draw?
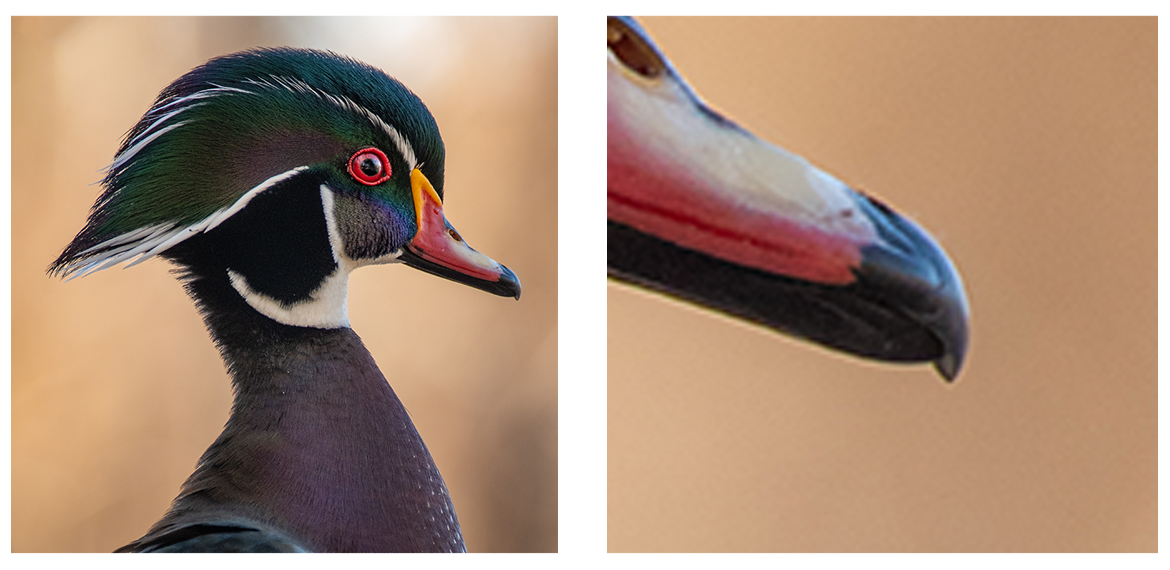
By cutting up the reference, we give some structural integrity to our drawing while dividing a complicated image into simpler pieces.
general process
Create two grids: one over your reference image, and one upon the blank drawing canvas. Then draw what you see in the reference grid on the blank grid. The process is very similar for digital and physical mediums, although each has unique tools to help you out.
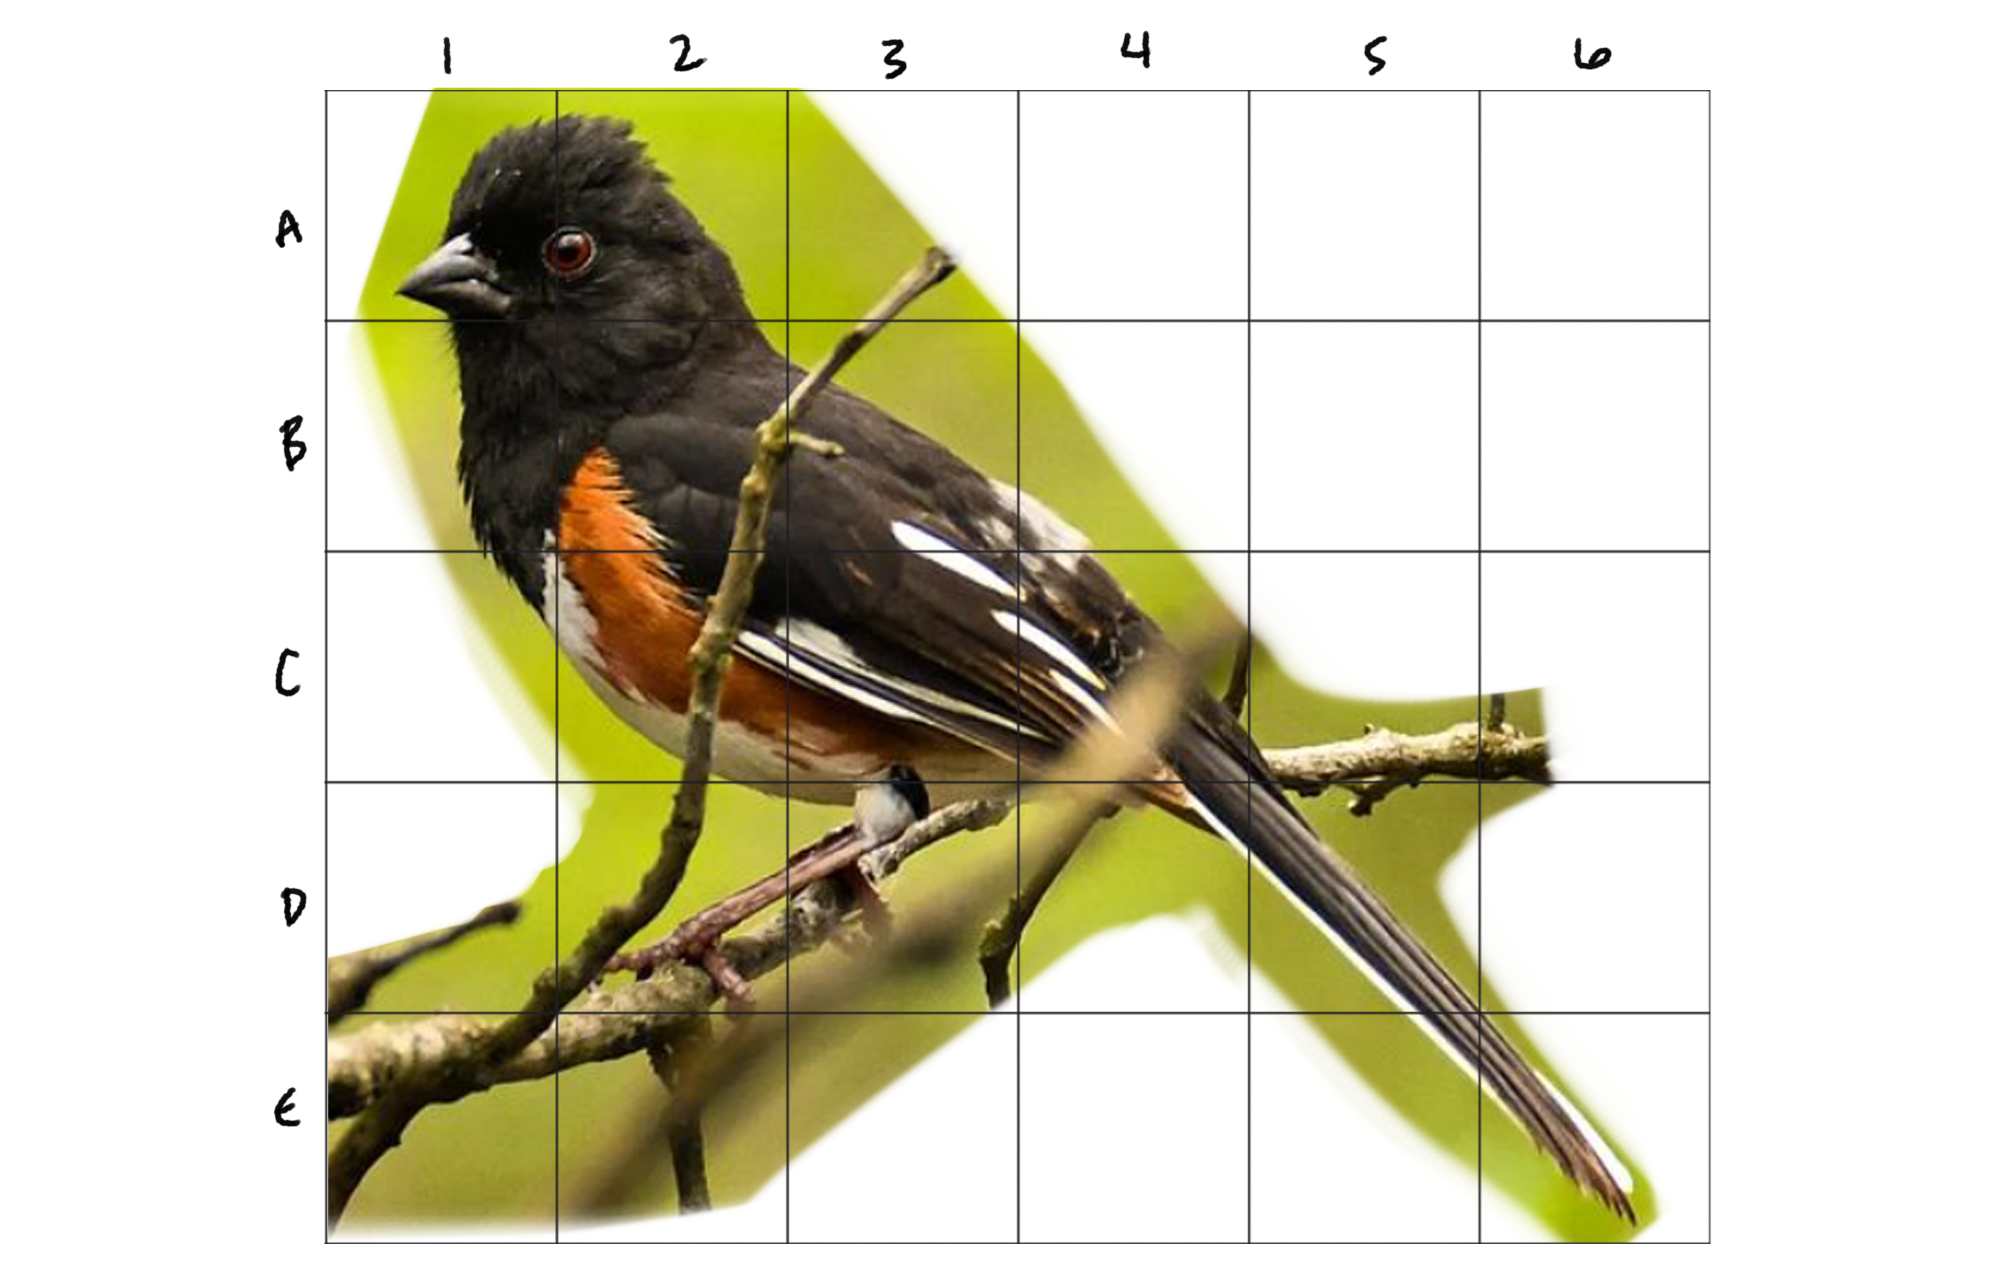
Step 1: Create a grid on your reference image.
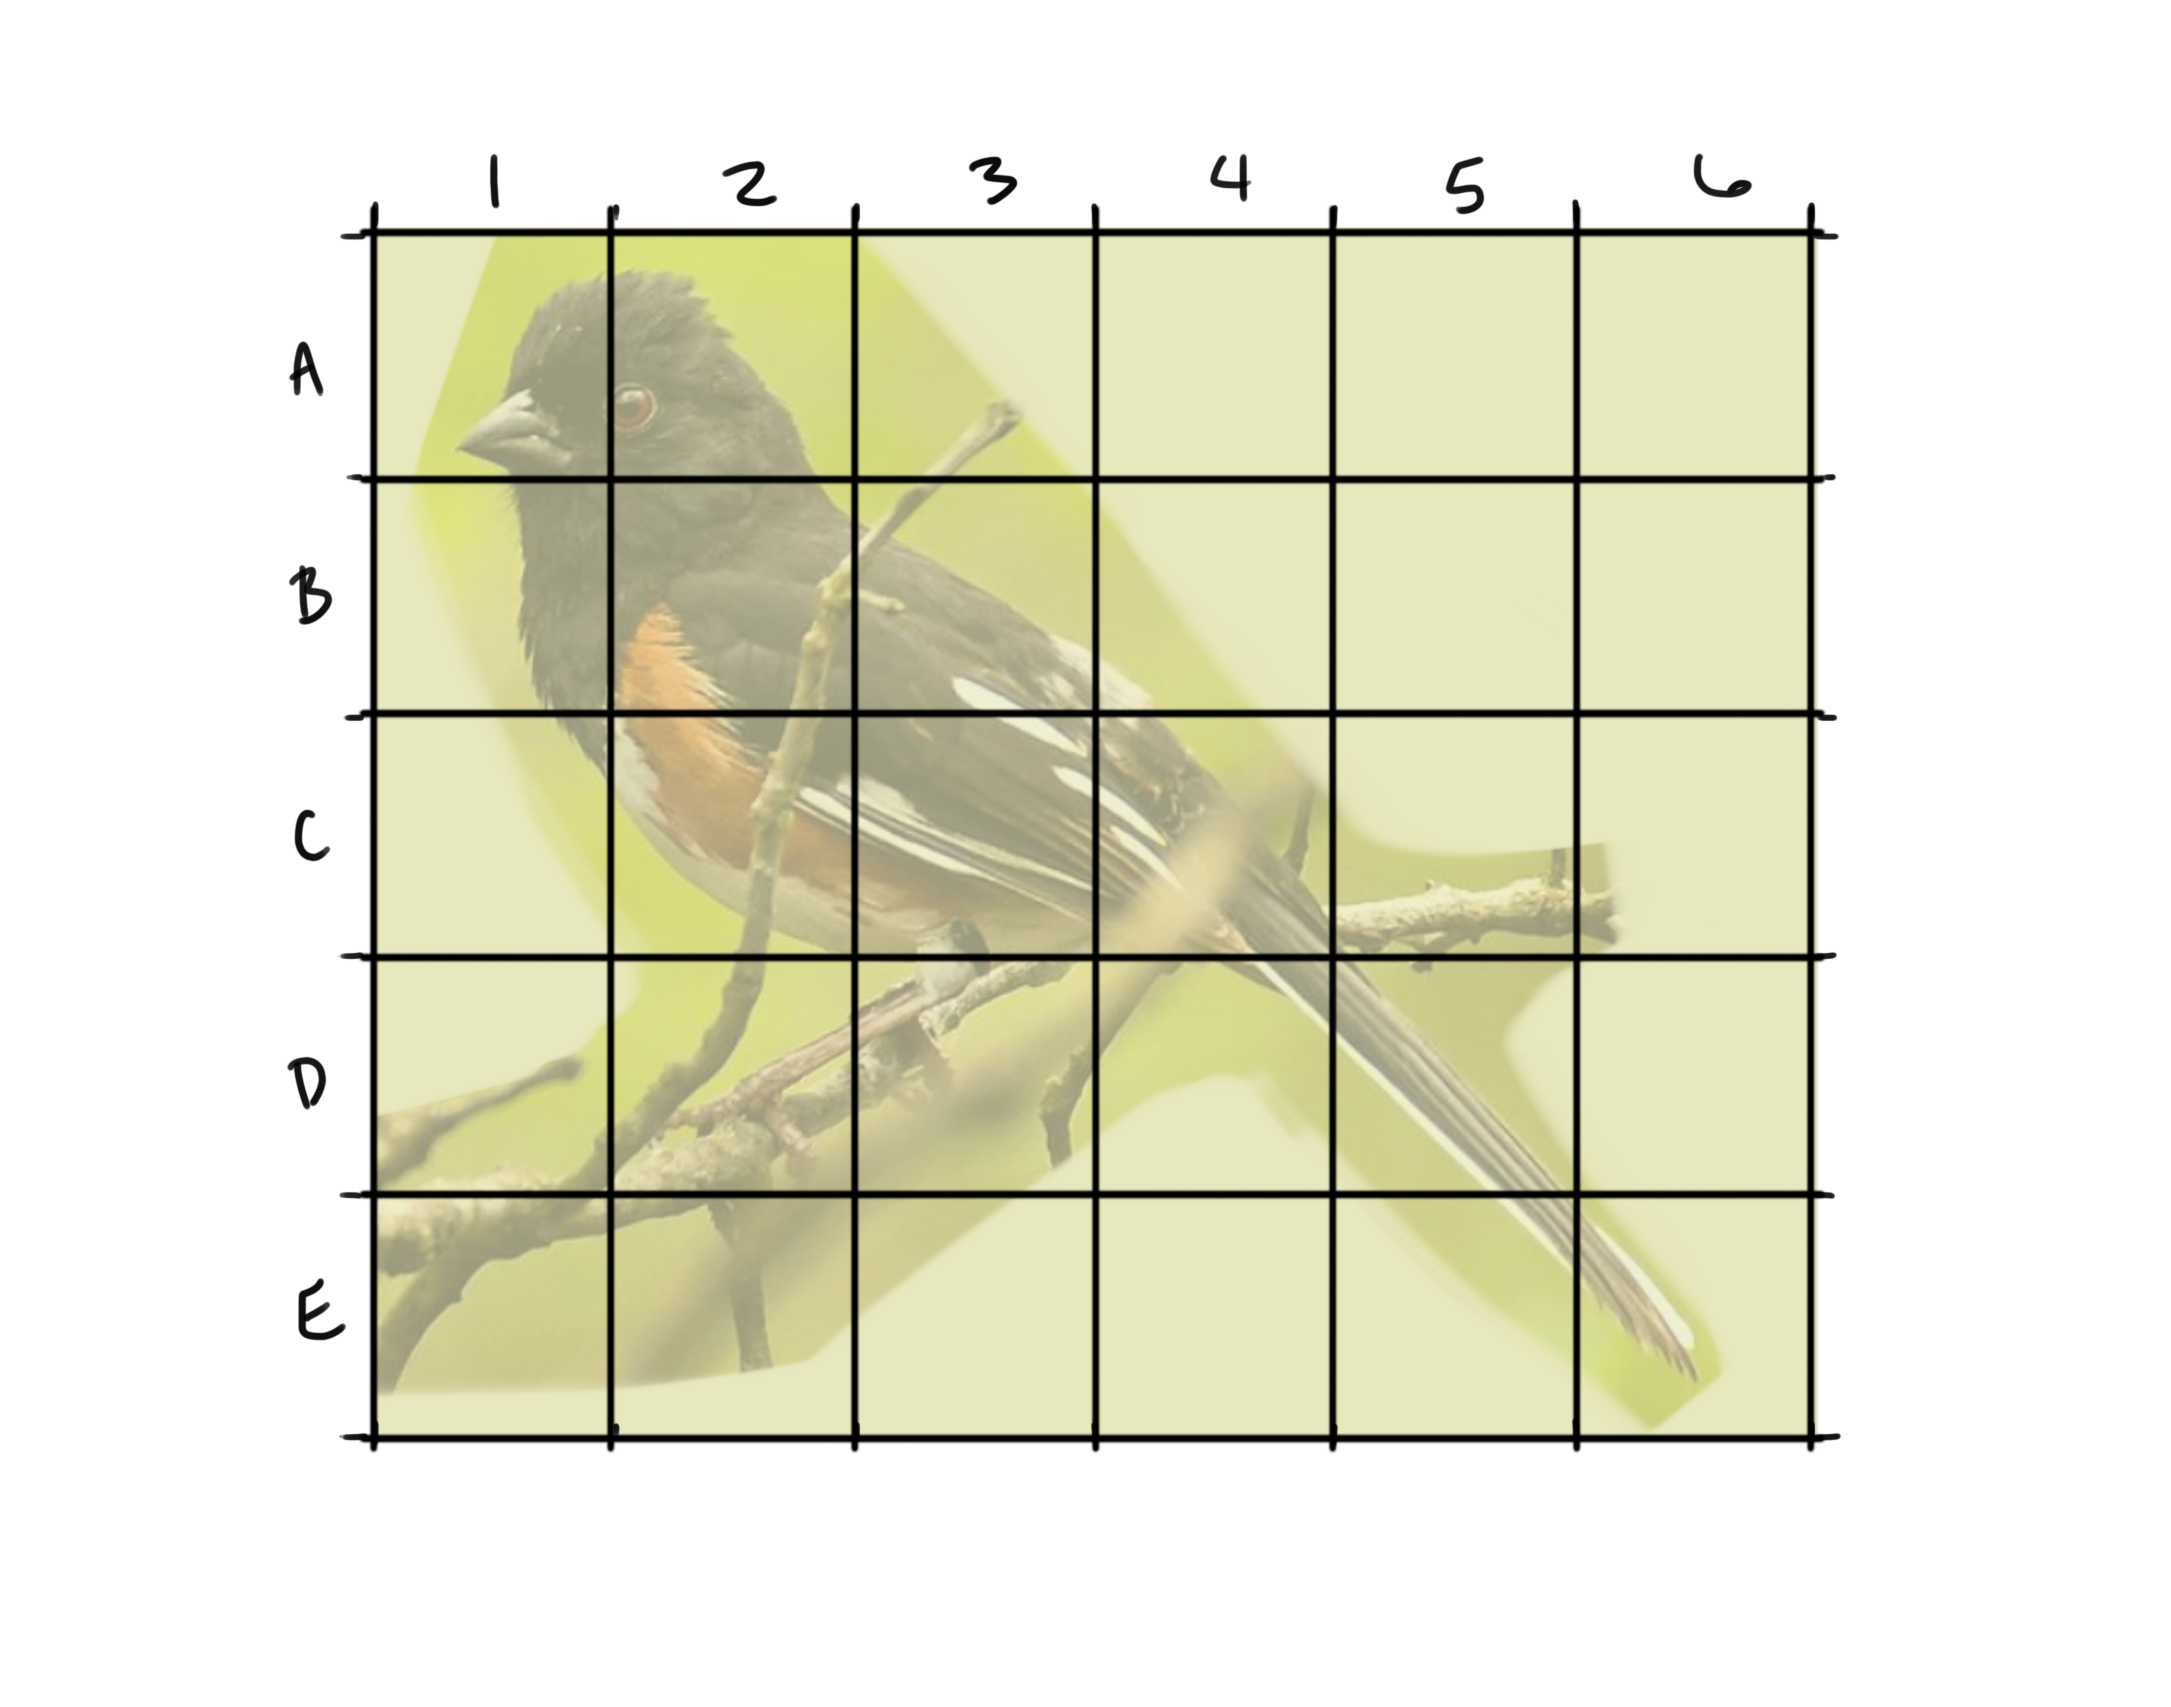
- Number each column and row to make navigation easier. This is especially helpful for grids with many squares.
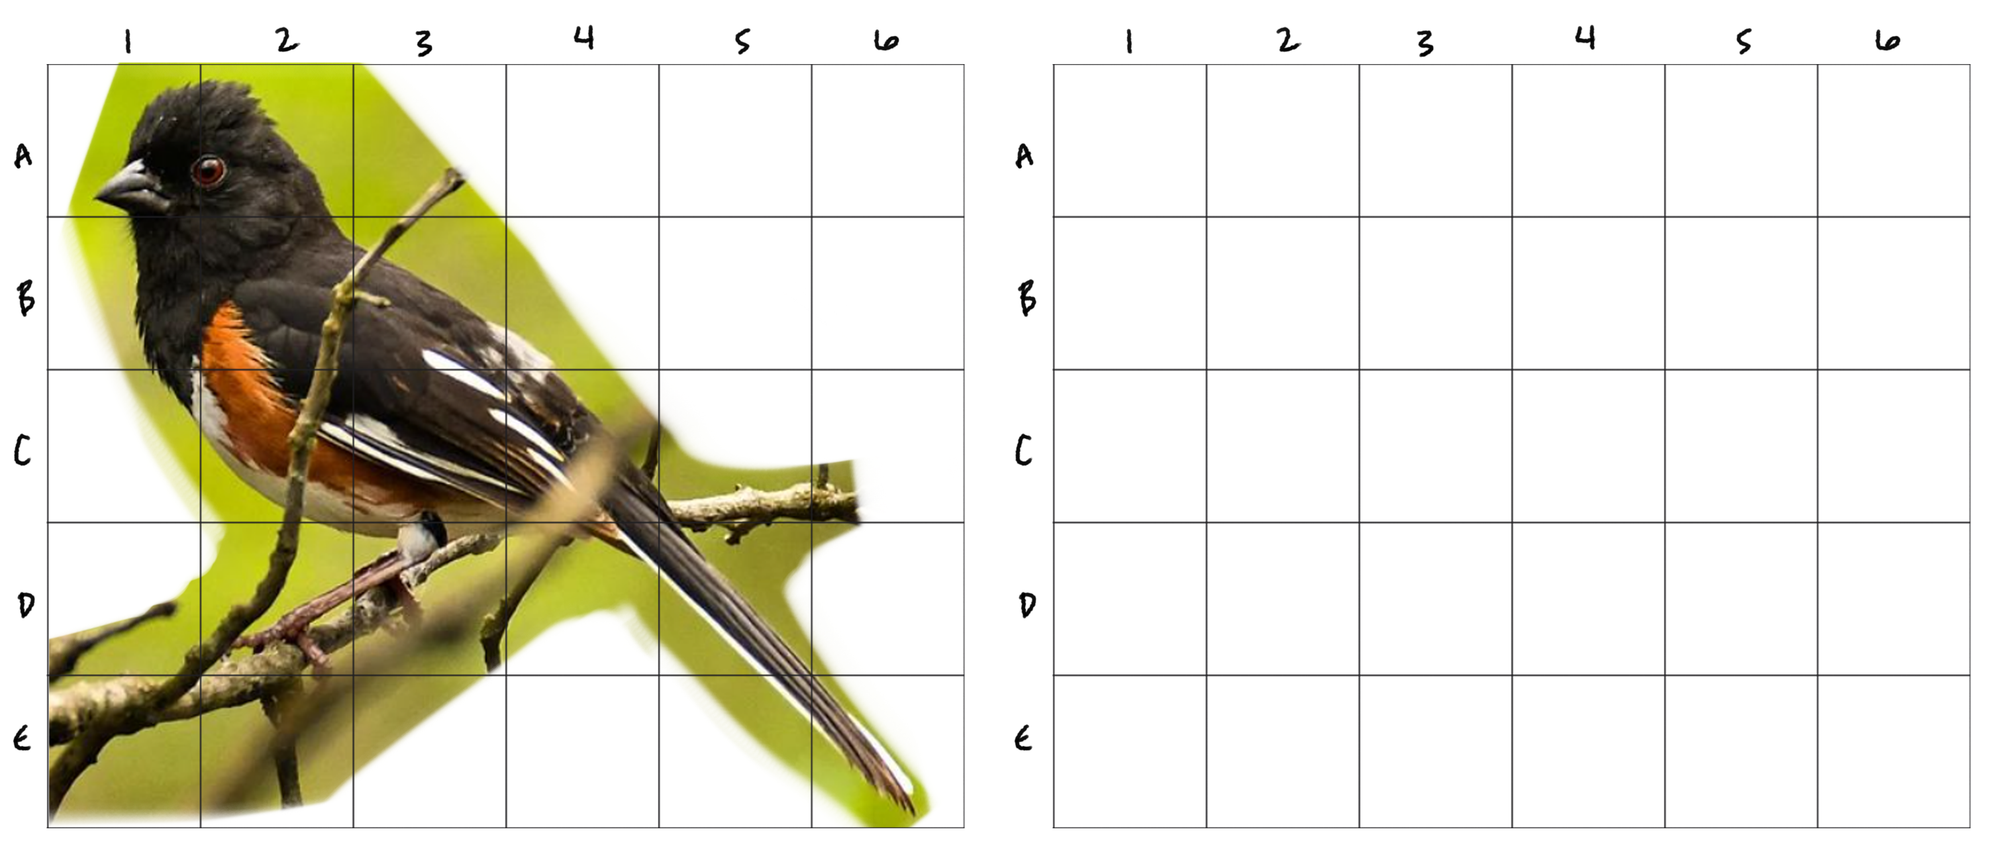
Step 2: Create duplicate grid on your drawing surfacee (paper, Procreate file, bedroom wall, etc).
- The drawing grid needs to have the exact same amount of columns and rows.
- If you want the grid to be hidden at the end, plan ahead. More on this below.
- If you numbered your columns and rows on the reference, do it here too.
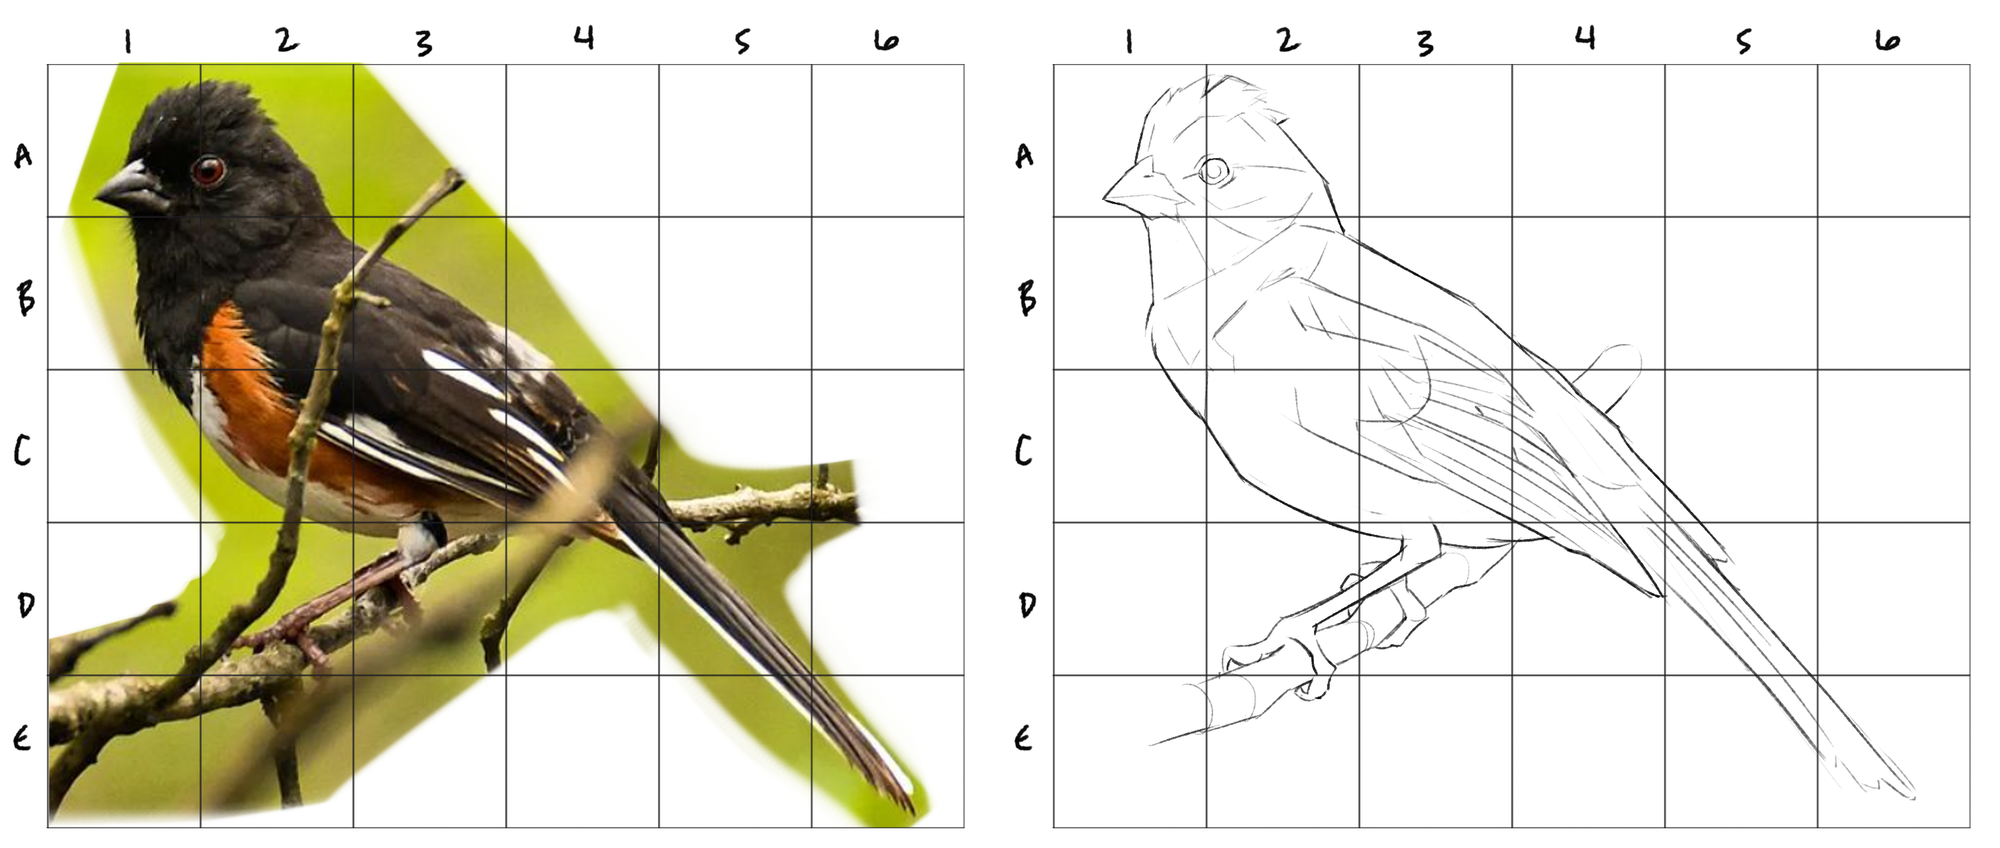
Step 3: Start drawing!
- There are two most-common methods: draw one square at a time, or work from big outlines to small details. I prefer the latter, so I sketch in the overall outline of my subject first, then work down to finer details.


digital media
If you're working in drawing software, the prep stage is easy as pie. The process is mostly as described above, and there are plenty of ways to modify it as you see fit.
I like to place my reference and my drawing in the same canvas so that I don't need to toggle back and forth between files. I find a grid from Google Images, paste it into the top layer, copy it to the side so I have the grid over my reference next to a blank grid, reduce the grids' transparency, and draw under the blank one on a separate layer.
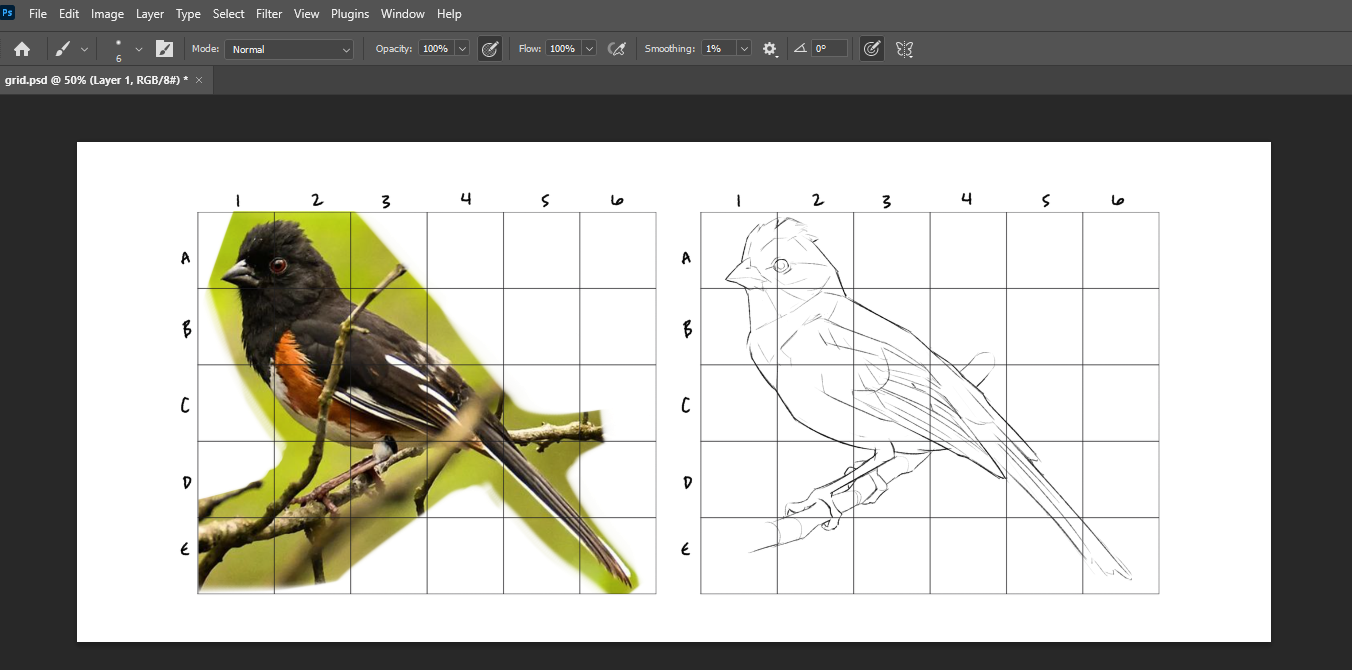
There are many grid-making tools to overlay grids on an image in browser, plenty of tools and tutorials for Photoshop, and methods for Procreate. I just grab my grid from Google Images because I am ⭐lazy.⭐ Do not draw on the grid layer, or it will be a PITA to separate your grid and drawing!
physical media
For transferring your reference onto paper or canvas, the process is similar, but we'll draw the grids by hand. Alternatively, you can buy transparent plastic grids to save some time.
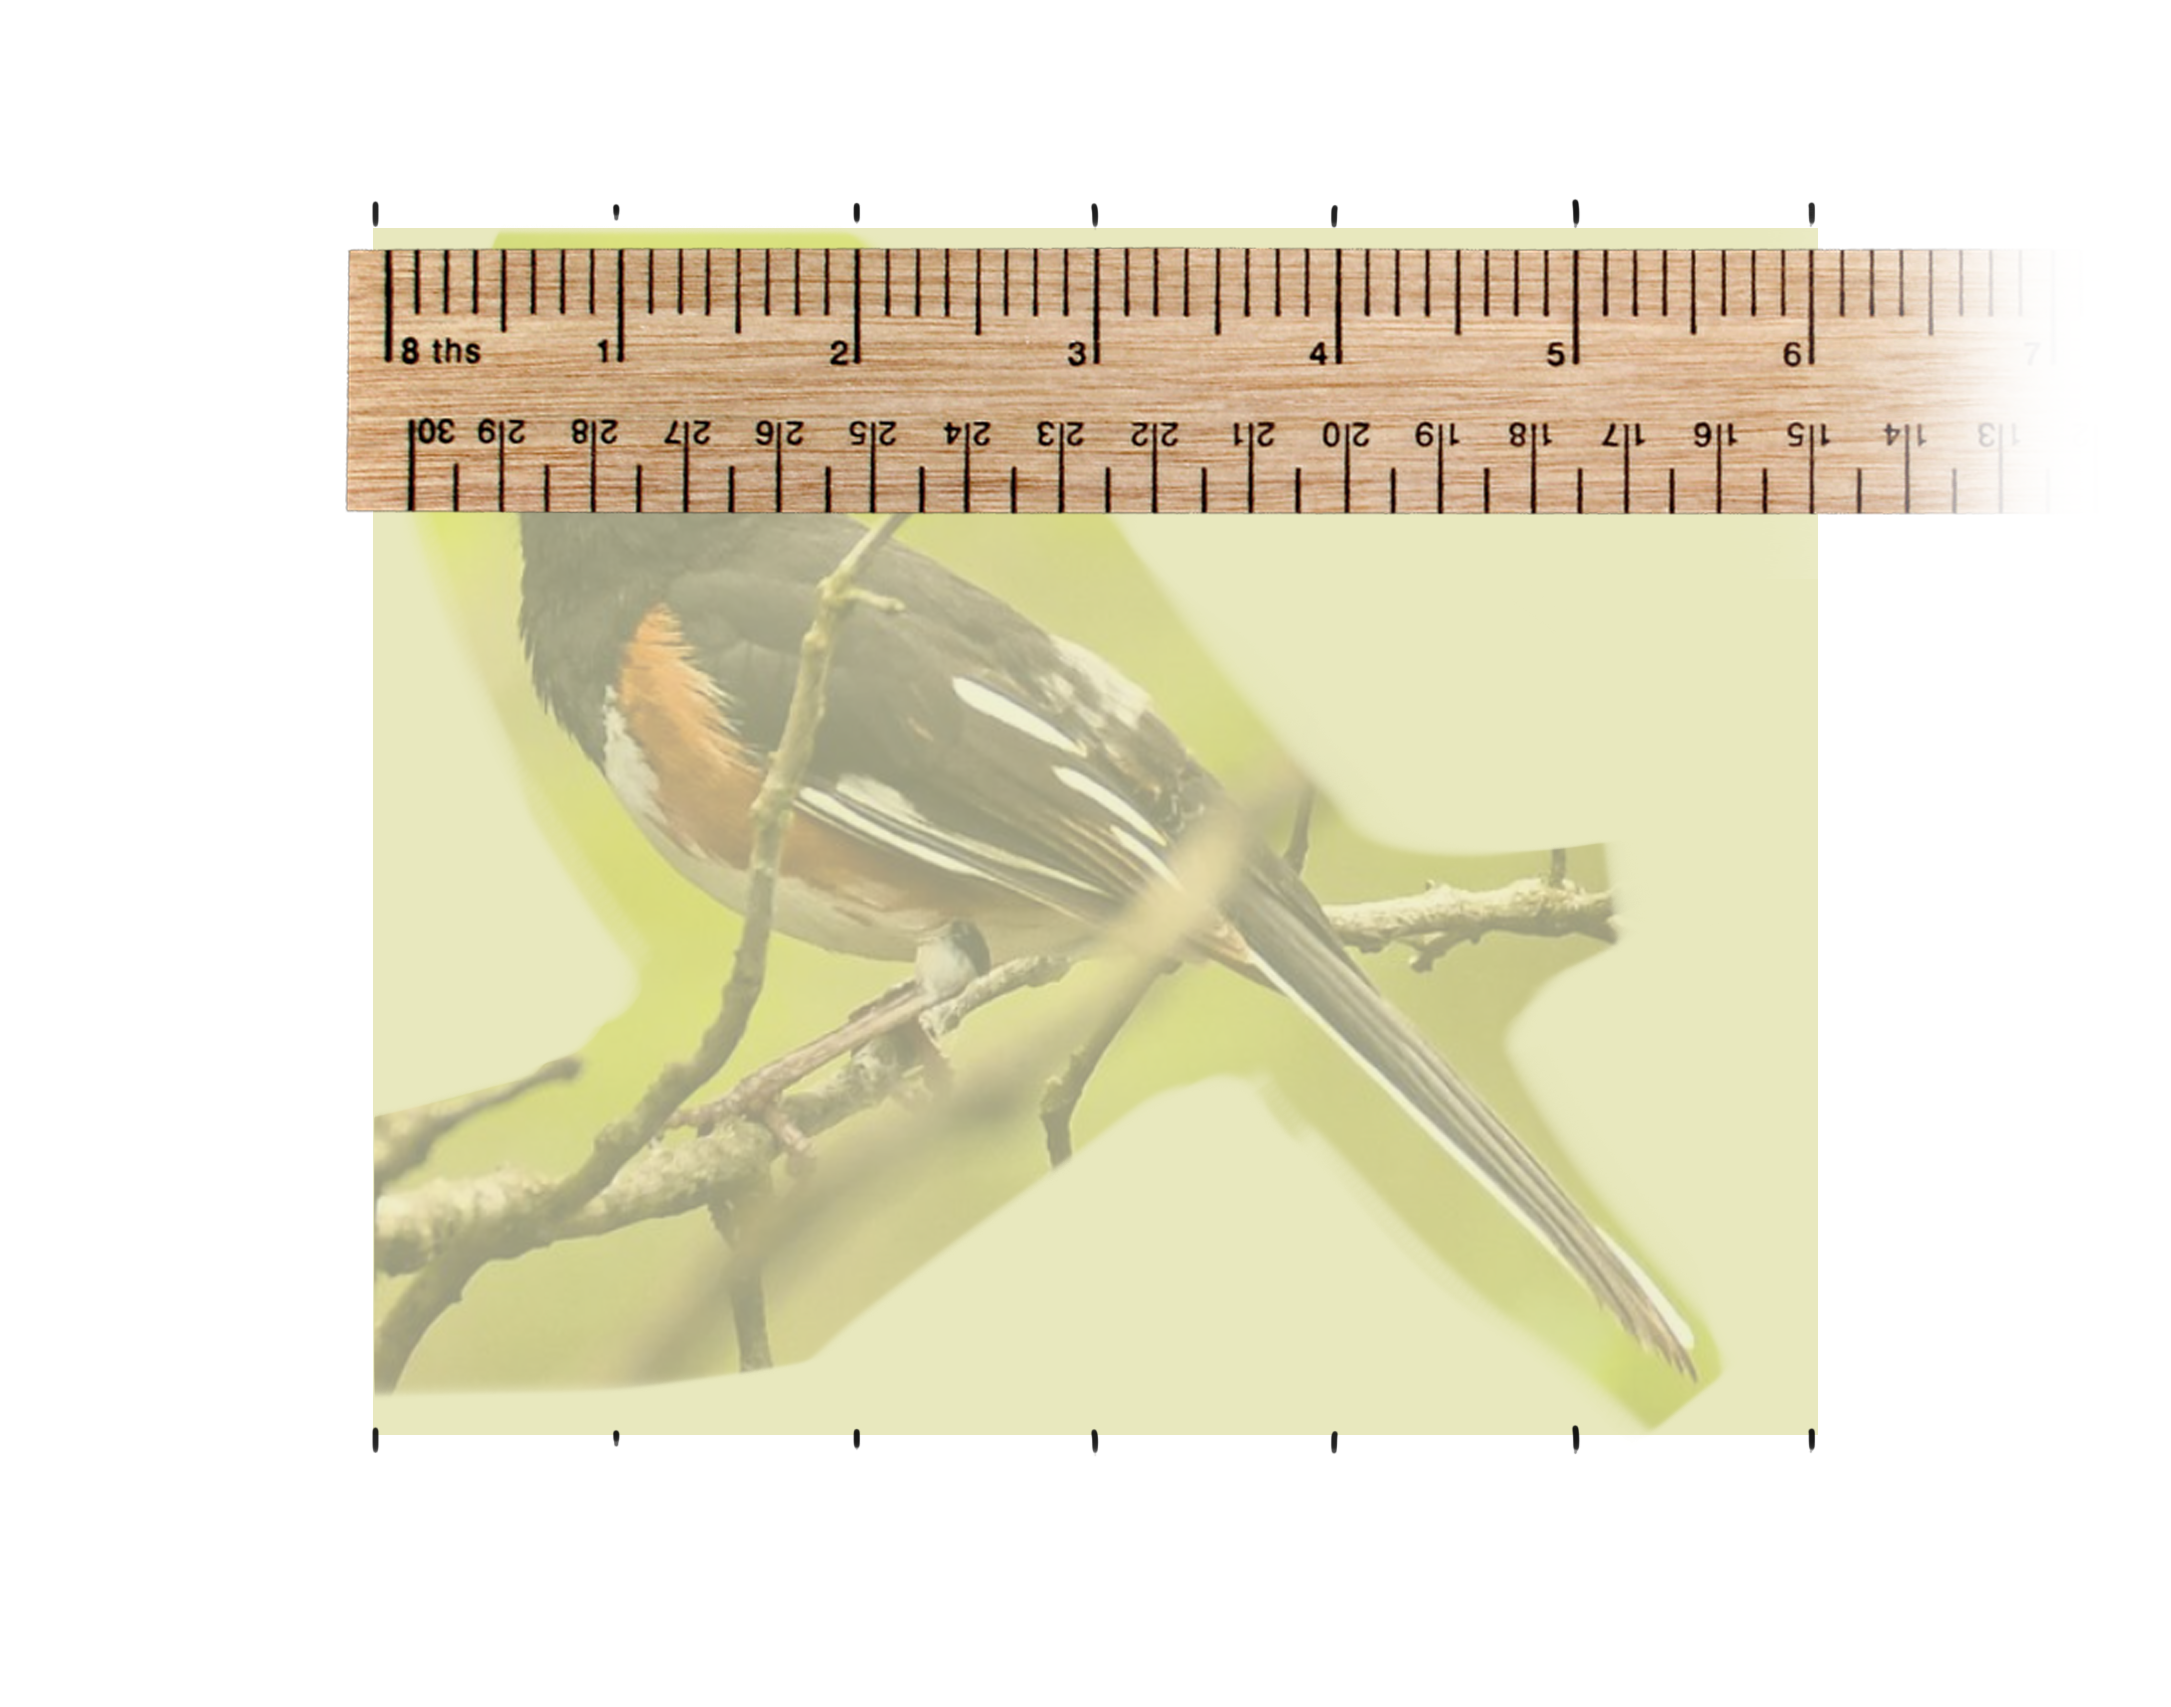
You'll want a ruler, pencil, and eraser for this. First, print your reference on standard printer paper. It's ideal to print the image quite large, at least 6 inches wide and tall.
Step 1: Using your ruler, draw a grid directly onto your printed reference image with a sharp pencil.
- Across the top edge of the image, mark every inch (or half-inch, or centimeter.) Do the same along the bottom. Line up your ruler with the top and bottom dots to draw vertical columns.
- Use a simple distance between lines to avoid errors. One-centimeter, half-inch, or one-inch apart are all great options depending on how dense you want your grid to be and how large the image is.
- You can draw these lines pretty heavily for clarity, especially if the image is dark. We want to be able to see the lines very clearly.
- Number your columns and rows.
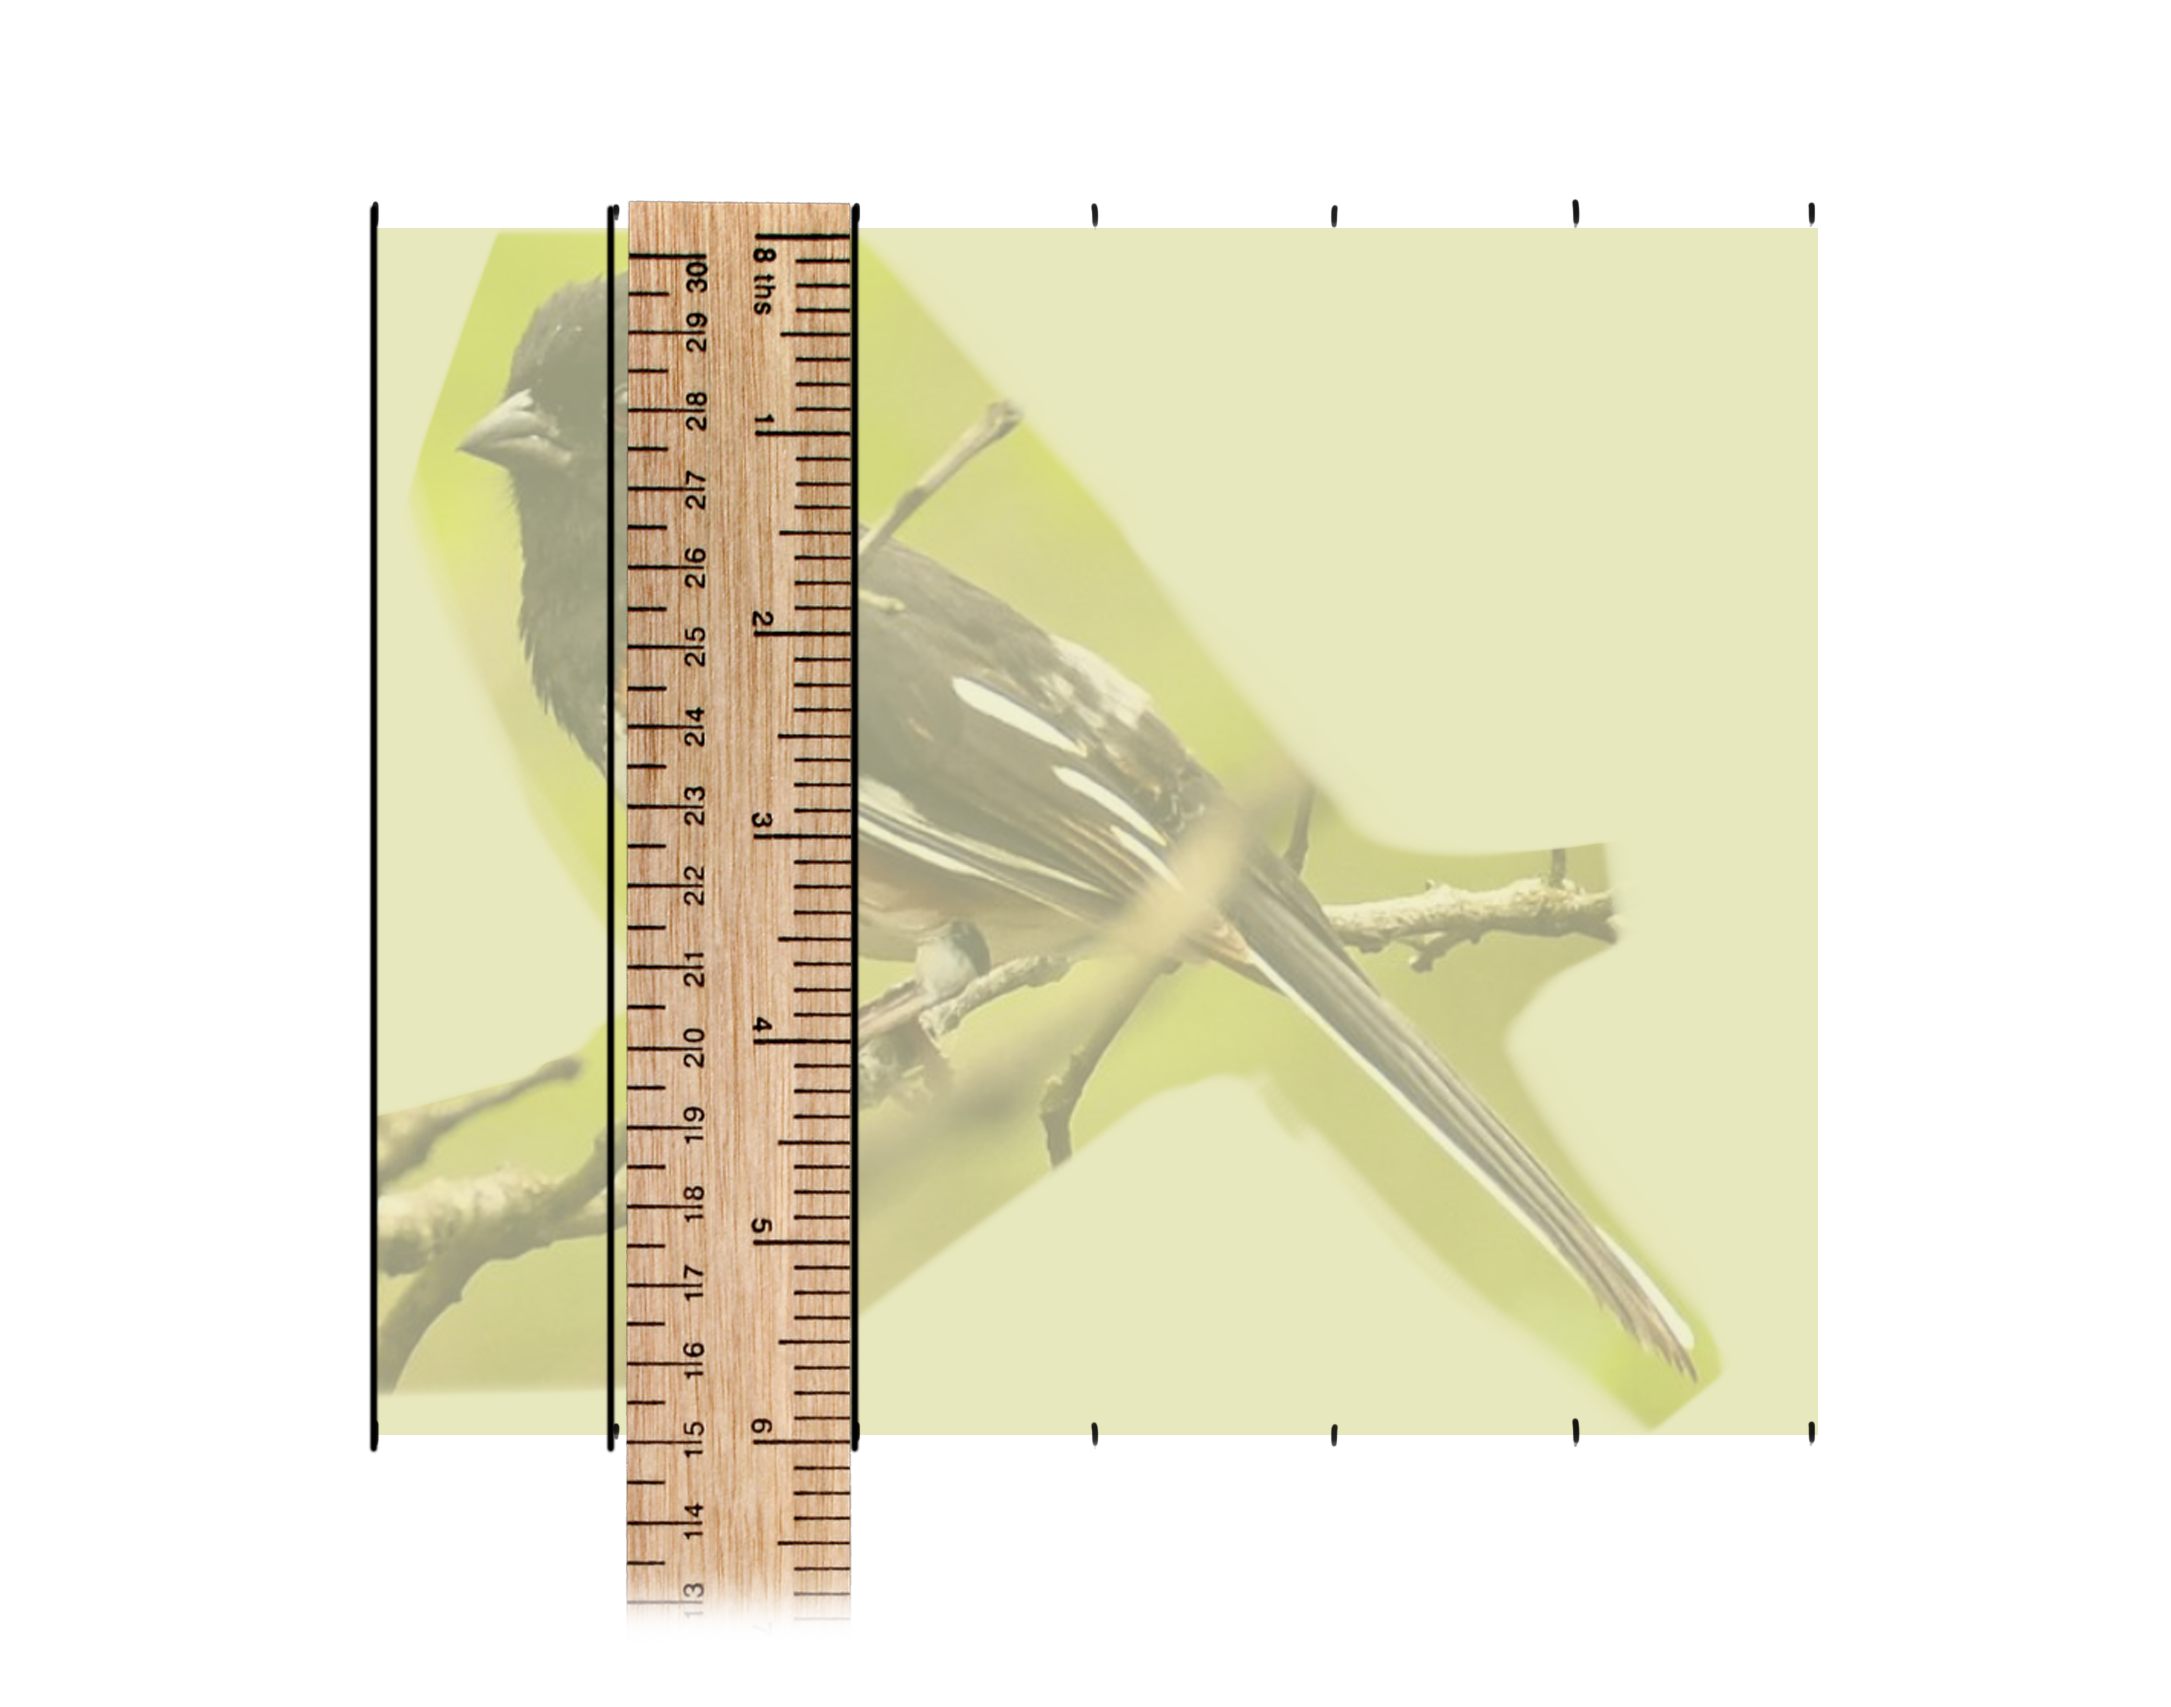
Marking an inch apart, drawing the vertical lines, then repeating to create the horizontal lines to create the final grid.
Step 2: Draw a grid with the same amount of columns and rows onto your drawing canvas.
- If you want to erase your grid at the end, draw very lightly! Test your eraser first.
- Number the columns and rows on this one too- again, very lightly.
Step 3: Draw!
- As outlined in the general process section, draw a square at a time or start with larger details.
- Continue to draw very lightly if you plan to erase the lines later.
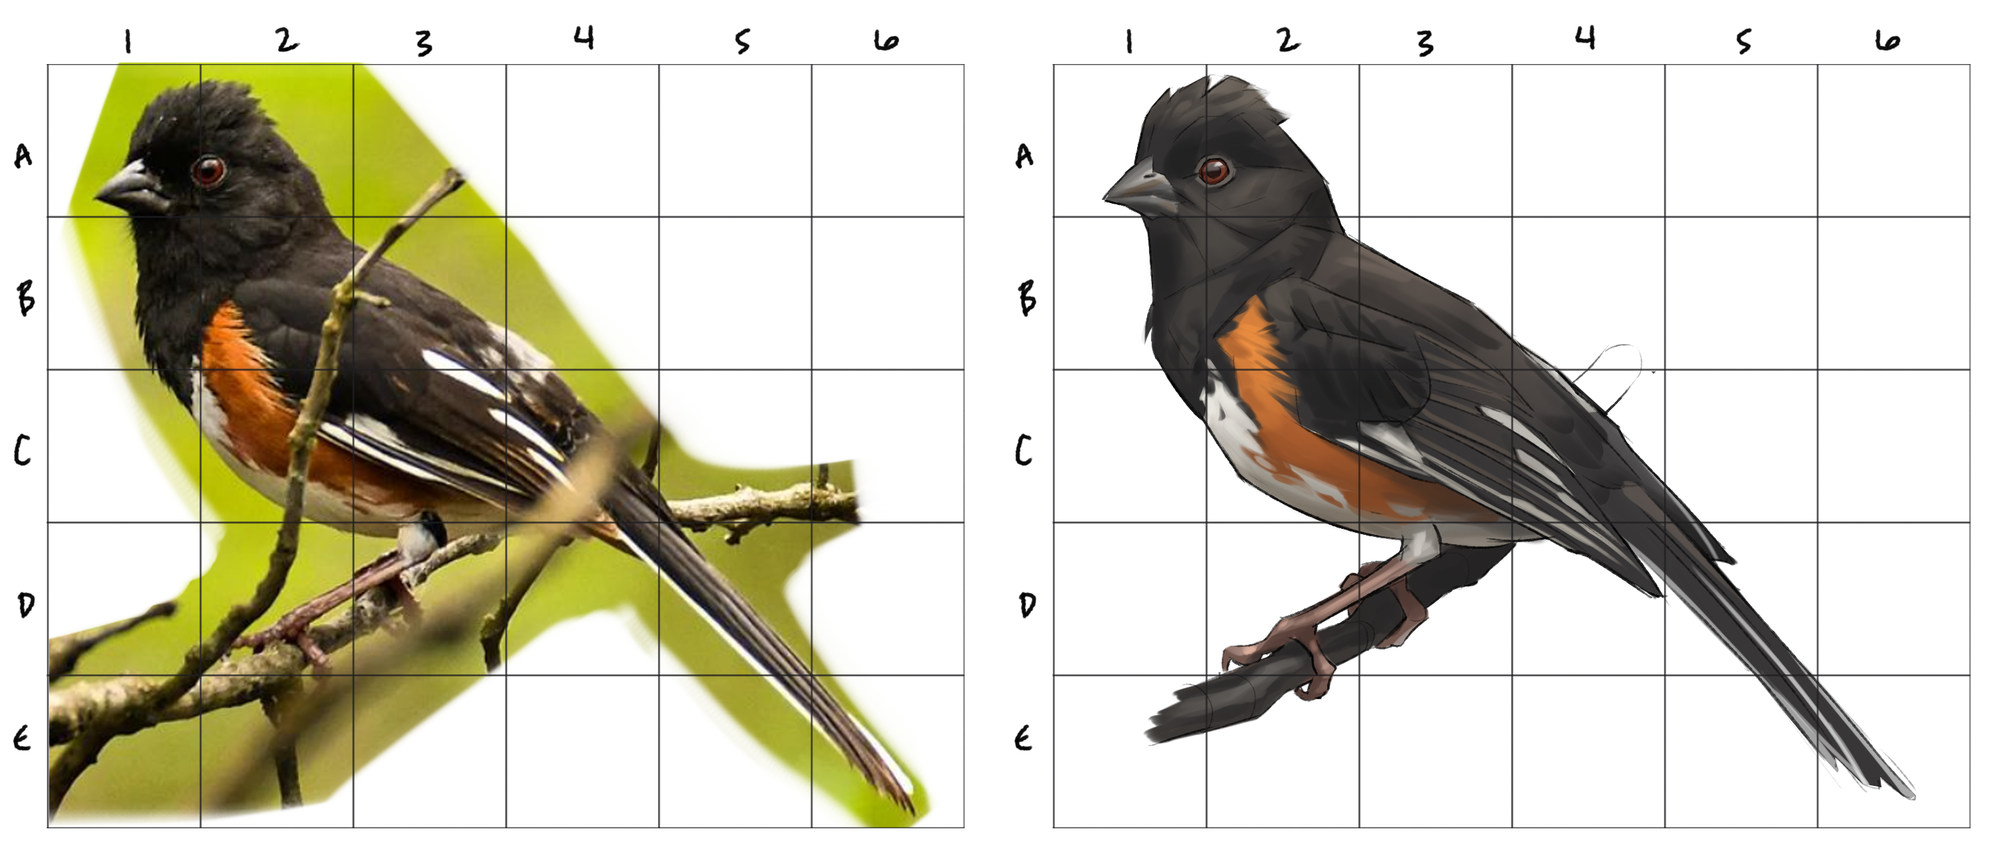
Step 4: You can then erase your grid and add shading, color, or details.
- In watercolor classes, we would draw with our grid, erase the grid, paint the image, then gently erase the line drawing.
modifying your grid
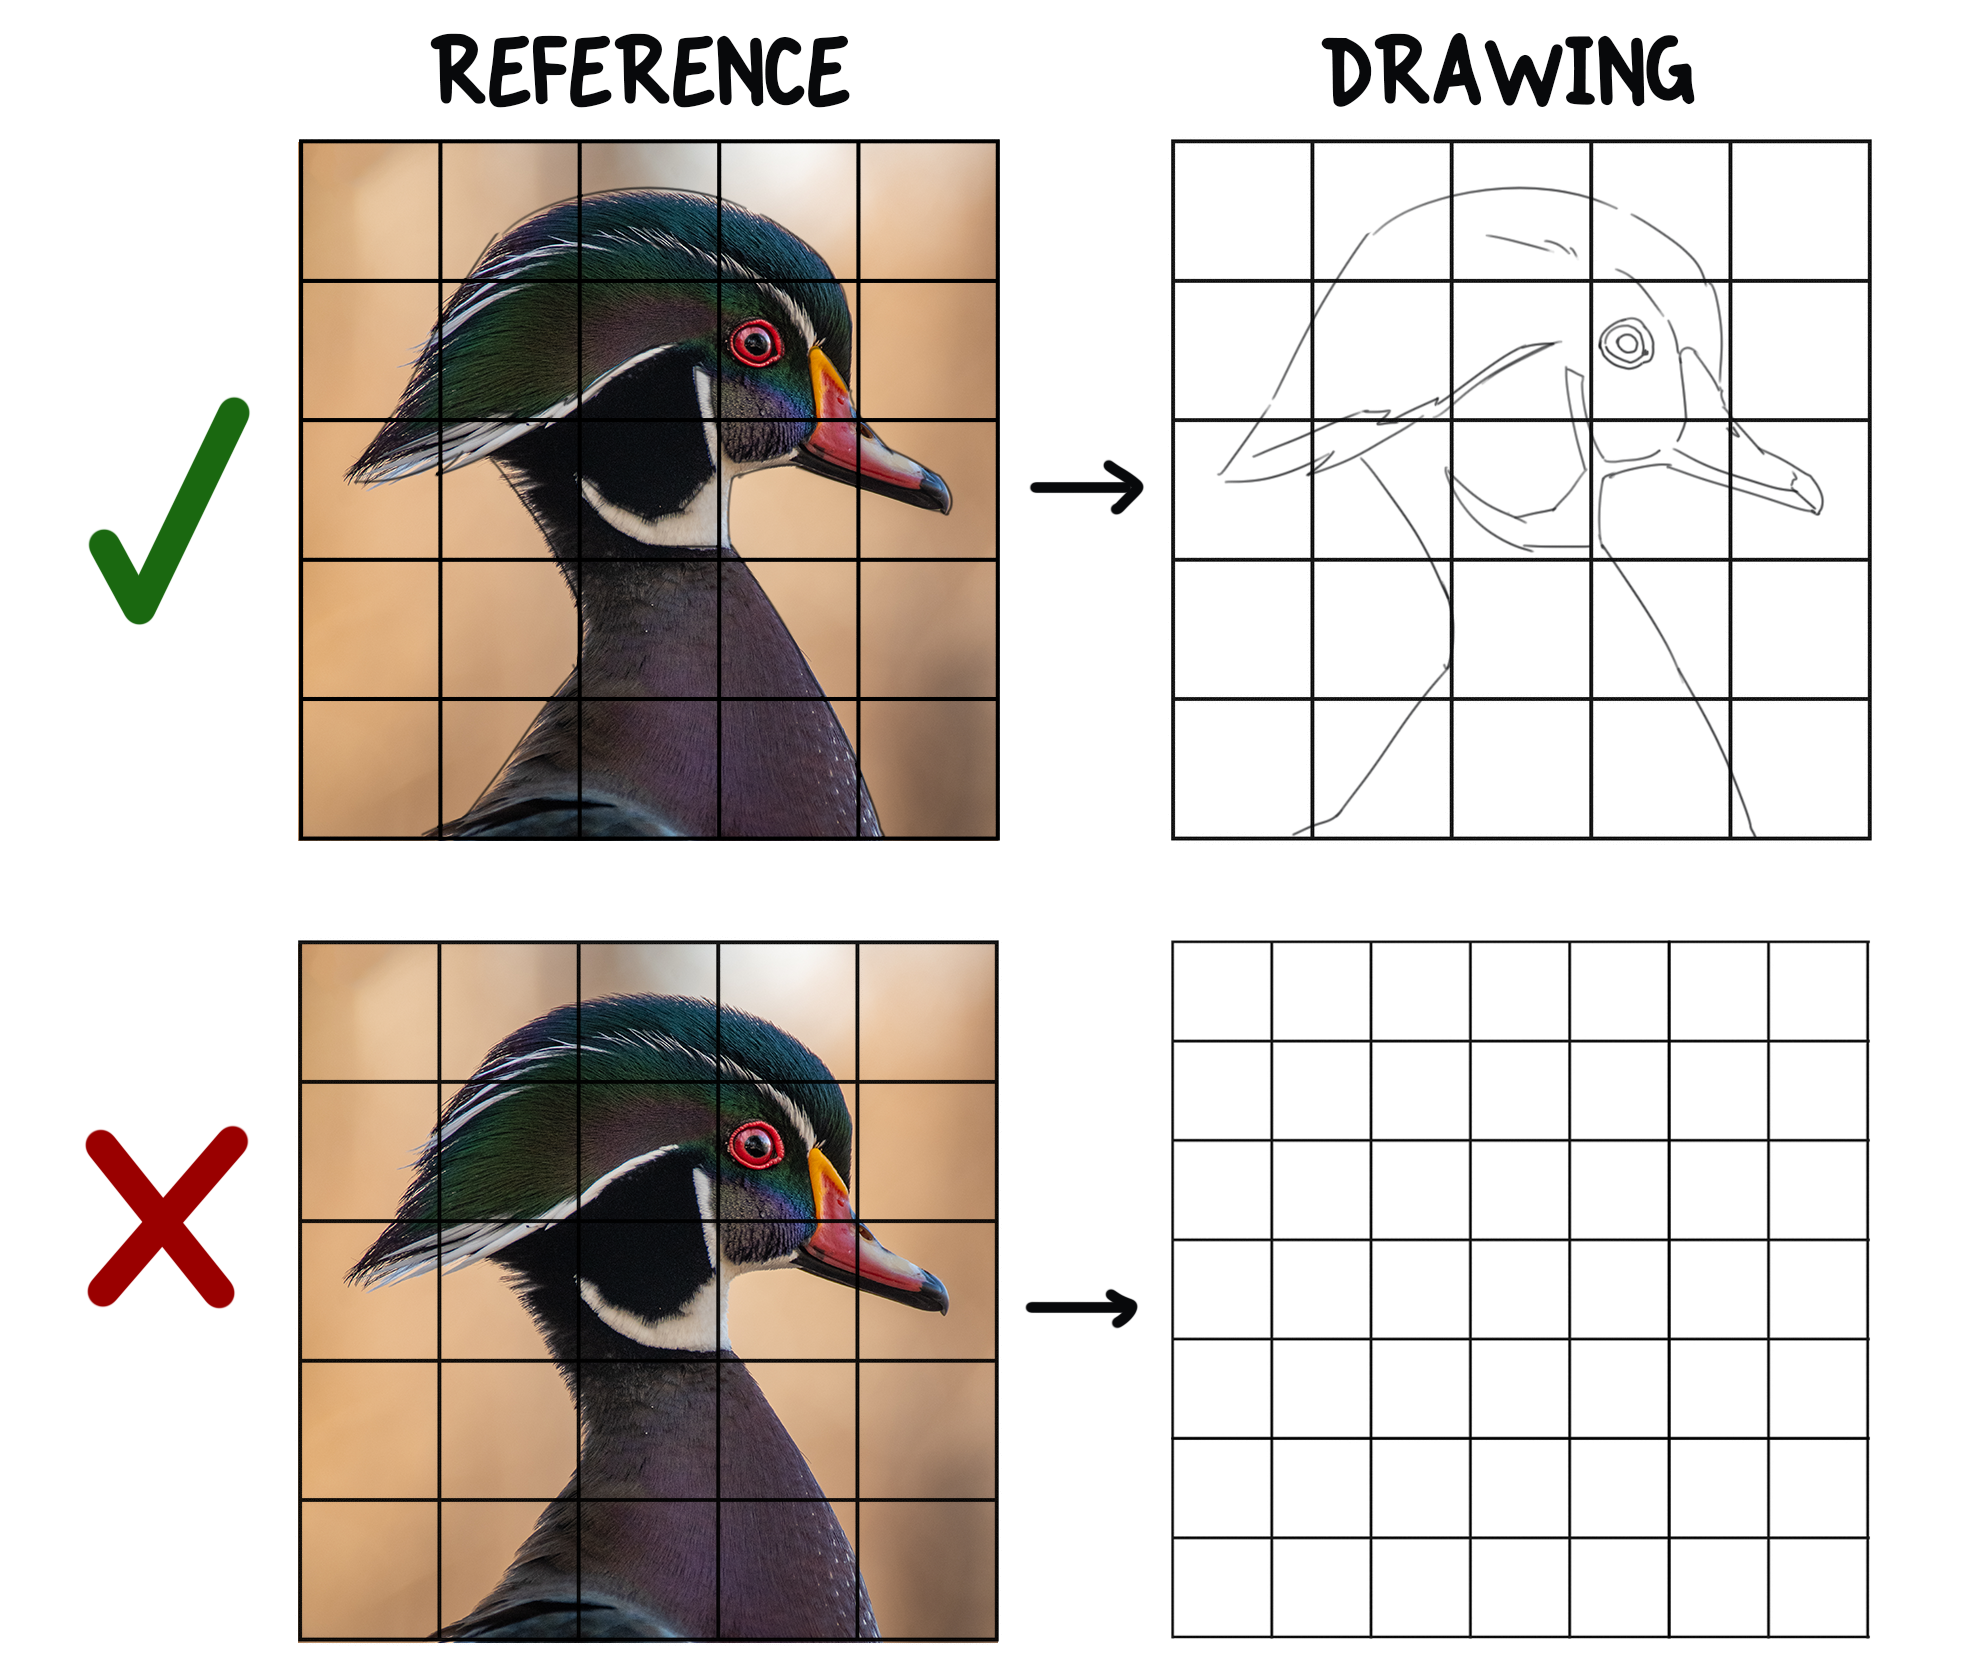
The amount of columns and rows used can impact how the final drawing looks.
Grids with many squares (like 10 columns and 10 rows, or more) will lend to a more accurate drawing because the image is broken down into so many pieces, but the drawing may feel stiff and rigid.
Grids with fewer squares are more challenging to make accurate, but they give your hand more room to draw with smooth gesture and flow. I prefer to sacrifice some accuracy for gesture. For most drawings, my go-to dimensions are between 4x4 and 6x6.
If you want to strengthen your observational drawing skills (a fantastic pursuit!) but are anxious about working on a blank page, then you can use a grid with very few columns and rows. A 2x2 or 3x3 grid gives you a bit of structure but still challenges you to fill in the details.
You can always subdivide the grid (or a section of it) to break down complex sections of the reference image.
avoiding setup errors
Each grid can be any size, but your reference grid and canvas grid need to both have the same amount of columns and rows for this method to work.
To avoid distorting the image, the proportions of the grid units need to be the same. Use squares for both grids. Rectangles just make things complicated.
practice practice practice
And that's it! Feel free to leave questions or your own experiences in the comments below. Looking for inspiration? Check out my photography section for reference images.